
I recently started working on a Phoenix/Elixir based project. Well, I’m too rusty for that, I said to myself. After many years of OOP, I was about to delve into the realm of functional programming. But, against common misconceptions, it turned out to be an enjoyable experience, and I literally feel I’m in the safe zone now (pun intended).
I got so excited about this new discovery that I decided to use Phoenix/Elixir for another project of my own. The thing is, I already had the frontend somewhat prototyped in Angular 9, so all I had to do is create a Phoenix/Elixir app that serves an Angular frontend.
Let’s see how we can make the two work together.
1. Create the Phoenix project
Open your terminal and navigate to your working directory and create a new Phoenix project. We will also specify it doesn’t add webpack, that will be taken care of by Angular.
mix phx.new --no-webpack
[Optional] You can navigate to priv/static/ and remove all files in there. Here is the place our built Angular sources will live.
2. Create the Angular project
In the root folder of your Phoenix project create the Angular project. Let’s call it frontend.
ng new frontend
2.1 Move files
For the sake of simplicity, let’s move angular.json and package.json from the frontend folder to the root folder of our project. The reason we’re doing this is to allow us to run npm and ng (angular-cli) commands straight from the root folder.
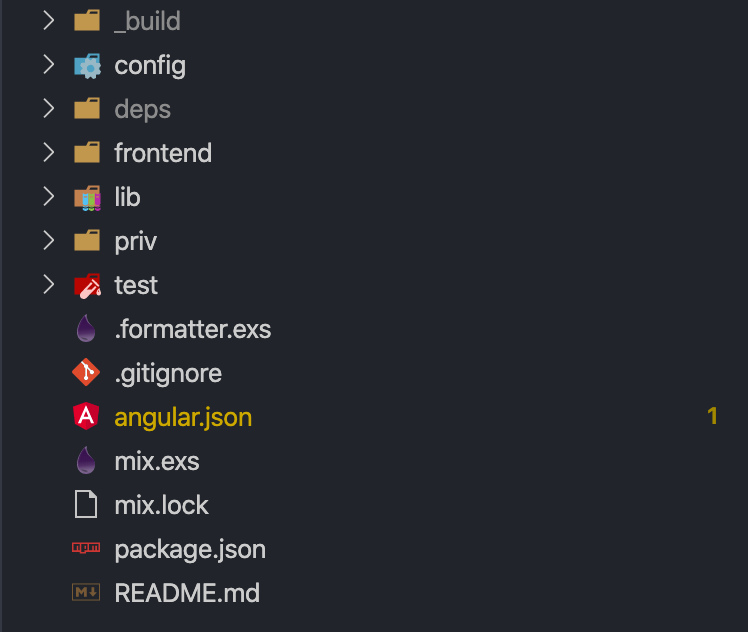
By now our project structure should look similar to this:
2.2 Remove unused files
Note: If Angular initialized a git repo and installed the default node_modules (it most likely did) you can safely delete them as they will now be available in the root folder. To do that navigate to /frontend and run rm -rf node_modules and rm -rf .git. Also, delete package-lock.json if any - another one will be created in the root folder.
Don’t forget to add /node_modules to your main .gitignore file.
3. Building Angular sources
3.1 Update the source paths
Because we moved some files around, we must to update the angular.json file such that each declared path reflects the new location. In our case we have to add the frontend/ prefix in several places. Check the following gist as a reference.
3.2 Set the frontend build output path
When Angular builds the project it creates a bunch of files that will end up in your users’ browsers. However, Phoenix has no idea whatsoever about those files unless we tell it about them.
Notice that angular.json file has a build option called outputPath, which is where the built files will be delivered. We will tell Phoenix to serve the files statically and because it already has a designated folder for static content, we will use it as Angular’s output path:
...
"outputPath": "priv/static/frontend",
...
3.3 Test build output
We are ready to do some tests. In your root folder run npm install to install missing dependencies, then ng build.
Once the build is done you should see a bunch of colorful lines in your terminal, representing the built files. But most importantly, open your editor and check the priv/static/frontend folder. You should be able to see all the files generated in the previous step by Angular.
4. Tying things together
4.1 Import sources
Now that we have all the frontend files, we need to tell Phoenix to serve them.
Angular is a single page application, which is why there is an index.html file that imports all the other components. With Phoenix, we can ignore that file and use the app.html.eex template file instead. You can find it in the lib/phoenix_angular_web/templates/layout/ folder. Phoenix comes with a powerful server-side template engine, but we will only use it to load the Angular files.
Open the file and replace the entire <body> with the the following lines:
<body>
    <app-root></app-root>
    <!-- Files generated with `ng build` -->
    <script  src="<%= Routes.static_path(@conn, "/frontend/runtime-es2015.js")  %>" type="module"></script>
    <script  src="<%= Routes.static_path(@conn, "/frontend/runtime-es5.js")  %>"  nomodule  defer></script>
    <script  src="<%= Routes.static_path(@conn, "/frontend/polyfills-es5.js")  %>"  nomodule  defer></script>
    <script  src="<%= Routes.static_path(@conn, "/frontend/polyfills-es2015.js")  %>"  type="module"></script>
    <script  src="<%= Routes.static_path(@conn, "/frontend/styles-es2015.js")  %>"  type="module"></script>
    <script  src="<%= Routes.static_path(@conn, "/frontend/styles-es5.js")  %>"  nomodule  defer></script>
    <script  src="<%= Routes.static_path(@conn, "/frontend/vendor-es2015.js")  %>"  type="module"></script>
    <script  src="<%= Routes.static_path(@conn, "/frontend/vendor-es5.js")  %>"  nomodule  defer></script>
    <script  src="<%= Routes.static_path(@conn, "/frontend/main-es2015.js")  %>"  type="module"></script>
    <script  src="<%= Routes.static_path(@conn, "/frontend/main-es5.js")  %>"  nomodule  defer></script>

    <!-- Files generated with `ng build --watch` -->
    <script  src="<%= Routes.static_path(@conn, "/frontend/polyfills.js")  %>"  type="module"></script>
    <script  src="<%= Routes.static_path(@conn, "/frontend/styles.js")  %>"  type="module"></script>
    <script  src="<%= Routes.static_path(@conn, "/frontend/runtime.js")  %>"  type="module"></script>
    <script  src="<%= Routes.static_path(@conn, "/frontend/vendor.js")  %>"  type="module"></script>
    <script  src="<%= Routes.static_path(@conn, "/frontend/main.js")  %>"  type="module"></script>
</body>
4.2 Add the base path
Angular also requires a <base href="/"> tag. Add it as a child element to <head>.
<head>
    <!-- other elements -->
    <base  href="/">
</head>
4.3 Allow static imports from frontend folder
Open the lib/pheonix_angular_web/endpoint.ex and locate the configuration of the static imports plug. Tip: it starts with plug Plug.Static. add frontend to the only list. It should look similar to this:
plug Plug.Static,
    at:  "/",
    from:  :phoenix_angular,
    gzip:  false,
    only:  ~w(css fonts images js favicon.ico robots.txt frontend) # <- here
You can also remove the items that are not used anymore (css fonts images js ...)
5. Run and Watch
5.1 Run the server
We’re all set. Run mix phx.server and open the browser. If all went well, you should see the app.component rendered. You may also want to double-check that the frontend files are generated, if not run ng build before starting the server.
5.1 Watch for changes
Right now, it is too much work to rebuild and restart the server each time we make changes to our code. Thankfully, we can instruct Phoenix to watch over our changed files and rebuild the sources automatically. To do that, open the config/dev.exs file and add the following watcher to the endpoint configuration:
config :phoenix_angular, PhoenixAngularWeb.Endpoint,
    http: [port:  4000],
    debug_errors:  true,
    code_reloader:  true,
    check_origin:  false,
    watchers: [
        ng: ["build", "--watch"] # <- this one
    ]
Earlier we added two sets of files in the body element. The first set is created when building the files statically (and will end up in production), whereas the second is generated when building and watching files. This seems like a bug, but the second set is used for Angular differential loading, which is building files a lot faster to save development time.
Troubleshooting
Normally, you will figure out on your what to do based on the messages if anything goes haywire. But here are some things I encountered along the way.
-
ng buildterminates with errors.- Make sure you don’t have any errors in your files (.ts, .html).
- Some package is breaking the build. For me, it was ng-cli-pug-loader that wasn’t translating .pug files to .html and thus resulting in verbose errors.
-
Failed to load resource: the server responded with a status of 404 (Not Found)- With the current setup, you will get some of these errors depending on which set of files is generated at build time (see step 4).
- However, these imports are taken from
priv/static/frontent/index.html. Make sure all imports in that file are also imported in yourapp.html.eexfile.
If you’d like to skip the steps above, please check out this ready-made template: https://github.com/ccheptea/phoenix-angular-template